Installing tire chains can feel like a daunting task. However, once you’ve got a bit of experience you’ll find installing tire chains can be quick and easy.
How quick and easy the installation is depends on the tire chain you select and how well you have prepared. At Vulcan Tire Sales, we strongly encourage customers to “test-fit” their new chains, and to practice installation and removal of tire chains. Mastering installation in dry, stress-free conditions will help immensely should you need to install chains in an emergency situation or in extreme weather conditions.
The experts at Vulcan Tire Sales are available to assist customers with tire chain installation questions and concerns. Questions may also be answered by reviewing the general installation instructions here, or by viewing our helpful instructional videos.
While various types of chains may have differing installation instructions, the same general safety guidelines apply for any tire chain/cable installation. Be sure to review these steps and perform them before installing your tire chains.
TIRE CHAIN INSTALLATION SAFETY BASICS:
- pull over onto level ground
- angle vehicle to shield from traffic
- turn off engine
- set parking brake
- place safety cone to increase awareness
- wear waterproof gloves/clothing to prevent frostbite
Specific installation steps depend on the chains or cables you select. Most steel link chains have similar installation instructions. Cable chain installation can vary widely depending on manufacturer or style of chain. Advanced traction devices feature very specialized installation. Some advanced traction devices offer installation in only seconds by simply stepping on a pedal. Each tire chain/cable arrives with instructions for that item. Below we have provided basic instructions for a popular chain model in each of the three main tire chain categories: steel link chains, cable chains, and advanced traction devices.
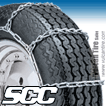
 How to Install a Steel Link Tire Chain: SCC Quik Grip PL
- Lay chains flat next to tire. Check for twisting or tangling. Cross hooks should face up.
- Place the chain onto the tire. Drape the chain so that one cross chain hits the point where the tire meets the ground.
tip: Make sure cross chain hooks are facing up. Downward facing hooks (facing towards the tire) will damage the tire.
- Drive forward carefully. You should drive over one or two cross chains. Turn off vehicle and reset the brake.
- Fasten the connectors. Fasten the inside connector by reaching behind the tire. Next, fasten the outside connector.
tip: all connections should be as even and tight as possible. You may need to drive a short distance and retighten your chains.
- Attach a tightener/tensioner.
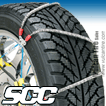
 How to Install a Cable Tire Chain: SCC Super Z-6
- Lay chains flat next to tire. Check for twisting or tangling. The tire side indicator should face up.
- Position the chain onto the tire. Slide the chain under the vehicle and pull it over the back of the tire.
- Connect the rear connector. Fasten the rear connector by reaching behind the tire.
- Connect the upper connector. Pull the cable toward you before connecting to create slack.
- Connect the lower connector.
- Attach a tightener/tensioner.
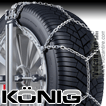
 How to Install an Advance Traction Device: Konig Easy Fit CU-9
- Remove chains from bag. Check for twisting or tangling.
- Spread apart the rear hoop. Hold the rear hoop using the red handles.
- Position the top of the hoop behind the tire.
- Place both ends of the hoop behind the tire. The red handles will go behind the tire.
- Flip open the pedal with your hand. Push it down with your foot until it clicks.
- Close the pedal.
|
 How to Install a Steel Link Tire Chain: SCC Quik Grip PL
 How to Install a Cable Tire Chain: SCC Super Z-6
 How to Install an Advance Traction Device: Konig Easy Fit CU-9